Overview
Event posts are created inside of a catalog or booth to hold information about sessions, keynotes or webinars. Event posts display information about the event, can be virtual or in-person, have a scheduled start and end time, and can be scheduled to appear and be removed. Event posts appear in event post directory sections inside the catalog or booth and on the homepage of the site or catalog.
In this article:
Step-by-Step Walkthrough
Step 1 - Log into the site
Find the “Login” button in the upper right-hand corner of the site’s homepage or login directly from the site’s login screen.. 
Step 2 - Go to your dashboard
If you are not taken to your dashboard after logging in, click your name and then "My Dashboard" in the upper right-hand corner of the site.

Step 3 - Locate "Events"
Select "Events" from the left-side navigation.
Step 4 - Add a new event post
- Select "+Add New Event", then select "Event" to add a new event.
- Select "Options", then "Edit" to edit an existing event.
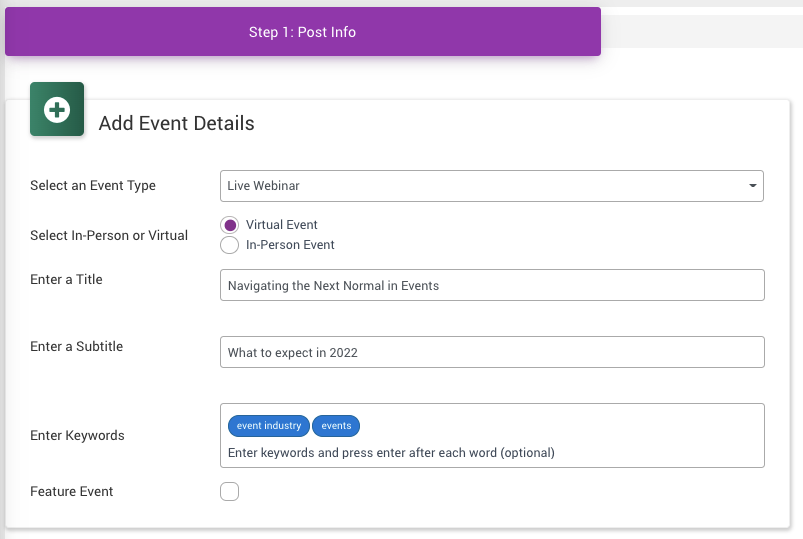
Step 1 - Add Event Details
- Select the event type (i.e. webinar, session, keynote, etc.)
- Select if this event is in-person or virtual. (Virtual is the default option)
- Add a title and as an option, add a subtitle.
- Add keywords to aid in search and press enter after each word.
- Select to feature the event so it will appear at the top of the post list in "All Posts".
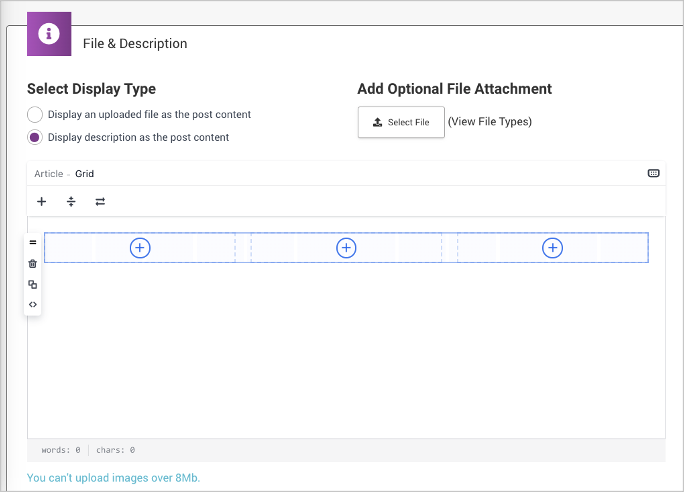
Step 1 - File & Description
There are two options to add information about the event. Upload a file to display as the post content. (A file can be viewed online, downloaded or shared). Or, use the text editor and create a description of the event that can include text and graphics. "Display description" is generally the preferred option.
- Select "uploaded" file or "display description"
- If a file is to be uploaded, follow the directions to select a file from your computer and upload it.
- If "display description" is selected, then put the cursor in the description area, then click the "+" key to add grids, then insert text, images, embed code, etc. into the grid space.
- As an option, add a file as an attachment for the viewer to download. This is often used for a session agenda or supporting event materials.
Step 1 - Customize Delivery Options
- Keep "Allow Email Share" selected to allow individuals to share the event via email.
- Click the "Select Attendee or Member Types" to the types that can view the event.

Step 1 - Select Post Thumbnail Image
Thumbnail images appear when you view the event post and in a directory listing. Selecting to upload a post thumbnail image enhances the graphic appeal of the post.
- Select to use a sample from an uploaded file OR
- Select to upload an image and follow the instructions to select the image from your computer, upload it, crop it and add ALT text.

Step 2 - Schedule and Registration
- Select if this event is one time or is recurring
- Enter the start and end dates
- Enter the start and end times along with the time zone.
- Select if registration or sign up for the session will be managed on this site, on an external site. If registration will not be required select "No".
- For registration on this site:
- Individuals will see a "Register" or "Sign Up" button.
- When an individual registers or signs up, the event will automatically be added to their calendar on the site and they can choose to add it to their personal calendar (i.e. Outlook)
- The individual can receive email reminders for the event if they are turned on for the site.
- Select to enable a registration limit (capacity) if needed and follow the instructions to set the limit, enter a message for individuals who attempt to register if the cap is reached and to create a wait list.

Step 2 - Webinar Options
- Click the drop down box to select one of the integrated video solutions (such as BlueJeans or Zoom)
- Select "Manual" from the drop-down box to enter a link to another video solution (i.e. Teams)

Step 2 - Event Contact
Enter an optional event contact to appear on the event post if needed.

Step 2 - Publish, Draft, Schedule
- Select "Publish Now" to have the event post go live on the site. Click "Post Now".
- Select "Save As Draft" to save it in the post list to come back and edit later. Click "Save".
- Select "Schedule" to enter a date when the event post will appear and be removed from the site. Click "Schedule".


Comments
0 comments
Please sign in to leave a comment.